To create a new category, do the following:
- In the Admin panel, select Catalog > Manage Categories to open the Categories page.
- To add a new root (top-level) category, click Add Root Category. To add a subcategory, click on the category name in which you want to make a subcategory, and then click Add Subcategory.

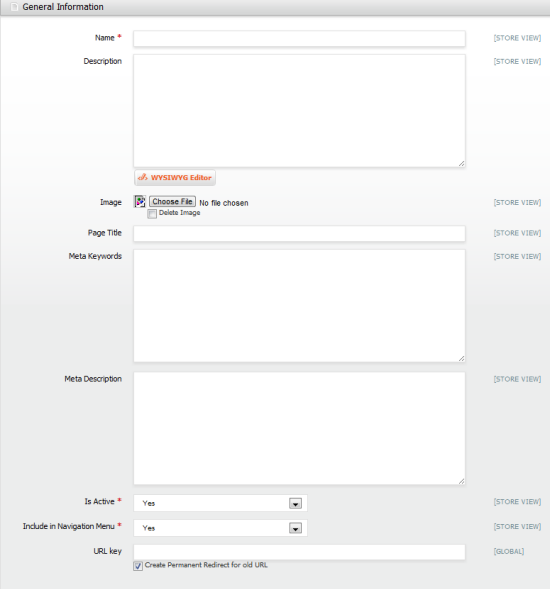
Create Category - In the main pane, in the General Information tab, enter they key information for this category.
- Enter information in the required fields:
Name – The name that you specify here will be referenced in the navigation menu bar on your front-end.
Is Active – Select Yes to make this category and all “active” subcategories active.
Include in Navigation Menu – Select Yes make this category show up in your store’s top navigation menu – otherwise, it will be hidden but still be searchable. - The URL Key field is designed to improve your search engine optimization (SEO) ranking. By default, a URL Key is automatically generated based on the category name. You can overwrite this field for better SEO management. Other key fields for better SEO management include the Page Title, Meta Description, and Meta Keywords fields.
- You can upload a default image for this category to be displayed on your store’s front-end when a customer clicks the category menu. This image will be displayed on top of the product list of this category.
- Click [ Save Category ] to save your changes.
- Repeat steps 2-8 above to add more categories to your web store.
